


by Fred Eaton
Summary:
This article covers the proper way to build your own braided stainless steel oil and brake lines using reusable fittings. In this article I will build a one-piece front brake line for a Norton Commando race bike, however, the procedure would apply to any other braided line.
Procedure:
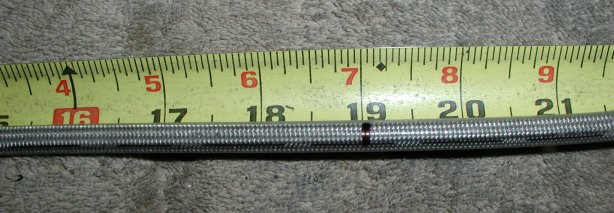
First: measure the existing line, or in this case,
the length from the master cylinder to the caliper. I put the
bike on a stand so the front wheel is fully extended. Then I like
to use a piece of ¼" hose or an old cable to string
from the master cylinder to the caliper (string would work as
well but you will need to allow enough extra for the braided line
to bend into the fittings). Mark the hose at the fitting where
the hose will meet with the fitting on the master cylinder, then
mark the hose at the caliper fitting. Remove the hose and measure
the overall length.
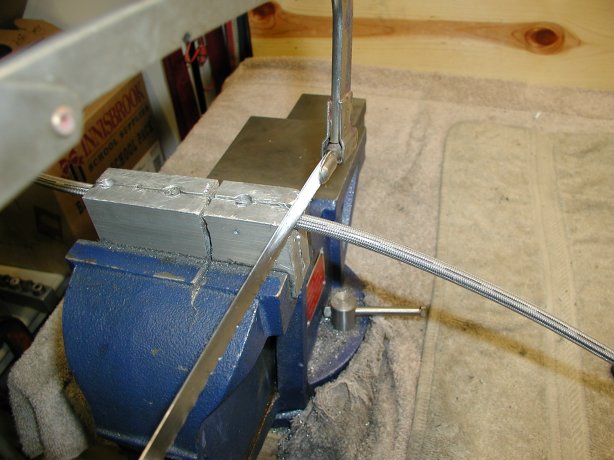
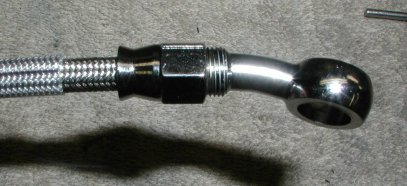
The following pictures are using a different fitting than is described in this article, but the install is the same for all our -3 fittings.
Second: cut the braided line. For this line, I used a 90 degree fitting at the master cylinder and a 45 degree fitting at the caliper. The 90 degree fitting extends the length of my line by 1 ½" and the 45 degree fitting by 1 ¼". You can subtract the amount the fittings extend the line from your first measurement (or in this case I only subtracted 1"). You can always cut the line shorter so I like to err on the long side. You can cut the braided line with a Dremel cut-off wheel, a fine tooth hacksaw, or anything that will cut and not fray the braid. To prevent fraying, put electrical tape around where you plan to cut. Our new brake line (part # 54-800101, $8.75, per foot as of 09/26/07) comes covered with a clear plastic protective cover, so you do not need to use electrical tape to keep the ends from fraying. After you cut the brake line with the protective cover you need to remove around 1" of the covering from the ends. I remove the covering with a sharp knife by first cutting the cover down to the braid, 1" from the end, all around the braid, then cut from the end in a helix cut down to the first cut. You should be able to start peeling the cover off at the end and down to the first cut.
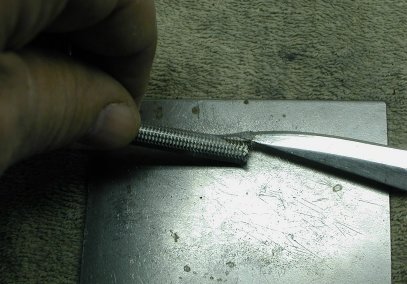
Third: Thread the threaded compression nuts on the line, making sure the threaded end faces toward the end of the line.
Fourth: Take a small screwdriver and gently spread the braid out so about 1/8" of the hose inside the braid is separated from the braid. The fittings I use have a compression ring that is ¼" long, so that is why I spread 1/8". Then feed the compression ring over the inner hose with the tapered part going over the hose. Just get the ring started, then push the ring home by placing the ring against a piece of wood and push on the line. This keeps the braid from inserting itself into your fingers. Look in the end of the ring and make sure the hose is completely seated. I like to take a punch the same diameter as the ID of the hose and push it through the hose to dislodge any frayed part of the hose and make sure the fitting will feed into the hose.
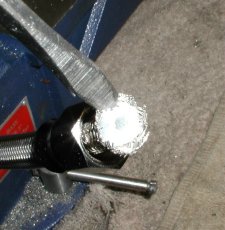
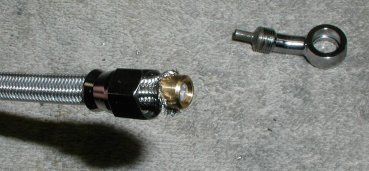
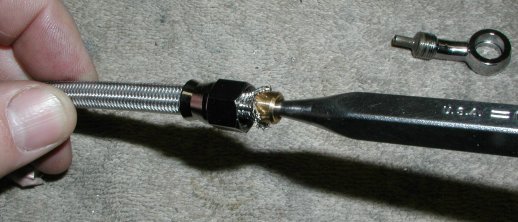
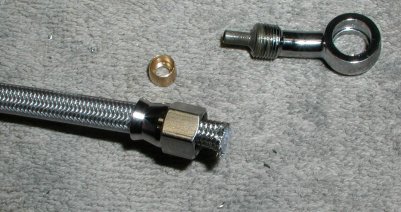
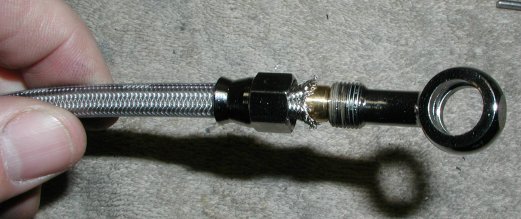
Fifth: Pull the compression nut over the compression ring and thread a couple of the threads on to the fitting by hand to get it started. Tighten the nut to compress the compression ring. The nut normally comes very close to touching the fitting when correctly tightened. A small gap is acceptable. Tighten the nut on to the fitting by placing the proper box wrench for the fitting hex head into a vise, then insert the fitting into the box wrench, then tighten the compression nut with another wrench. Please note, the fittings are reusable, but the compression rings need to be replaced if you are placing the fitting on a new section of line.
Last: Spray PJ1 Contact Cleaner through the hose to clean any contamination that may be there from the cutting and assembling process.
We stock fittings and the braided line so if you need some pricing or have any questions, just E-mail us at order@oldbritts.com.
This page was written and designed by F. H. Eaton & Associates if you have any questions or comments please contact us at eaton@oldbritts.com