


by Fred Eaton
Summary:
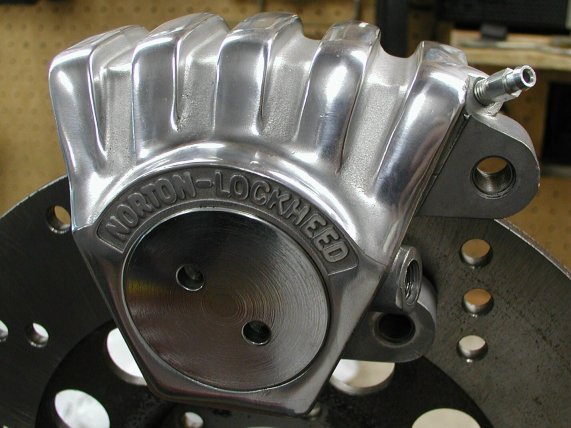
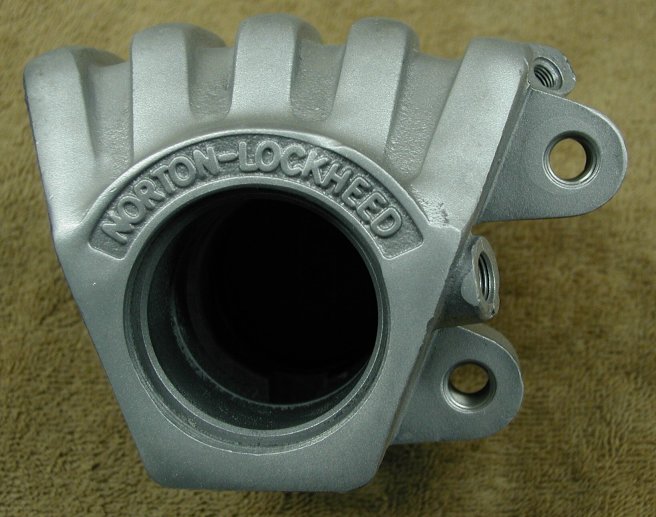
This article covers the procedure to rebuild the Norton Commando Disc brake caliper. This is a complete rebuild, consisting
of all new parts except for the caliper body, which is no longer available new. If you are just replacing the seals, you can ignore
the other aspects of this article.
We sell complete reconditioned used calipers see Reconditioned Commando Calipers.
We offer three recondition services for your caliper:
- Reconditioned with all new parts and stainless pistons (part # 06-1927/CR, $346.14)
- Reconditioned with all new parts except the caliper plug, with stainless pistons (part # 06-1927/CRO, $355.44)
- Reconditioned with all new stainless parts (part # 06-1927/CRS, $372.45)
Our caliper recondition services include all the parts and services described in this article. If you do not want to have your bike down while we recondition your caliper and we have a reconditioned caliper in stock, we will send you a reconditioned caliper, charge you a $255.00 deposit until we receive your old caliper back.
The parts used in this article:
- 06-4243 -- Caliper Rebuild Kit (2 06-1930 & 1 06-2187), $6.91.
- 06-1929 -- Caliper Bleed Nipple, $2.85 or 06-1929/SS -- Caliper Bleed Nipple, Stainless $13.11.
- 06-2185 -- Caliper Body Plug, $19.95 or 06-2185/SS -- Caliper Body Plug, Stainless $0.00.
- 06-1896/A/SS -- Stainless Caliper Piston, two required $29.49 each.
- 06-6005 -- Commando Brake Pads, AP Lockheed, Set, $29.95.
Procedure:
The first step is to remove the caliper from your bike, remove the brake pads, drain all the brake fluid from the caliper
and clean all the grunge off the outside of the caliper.
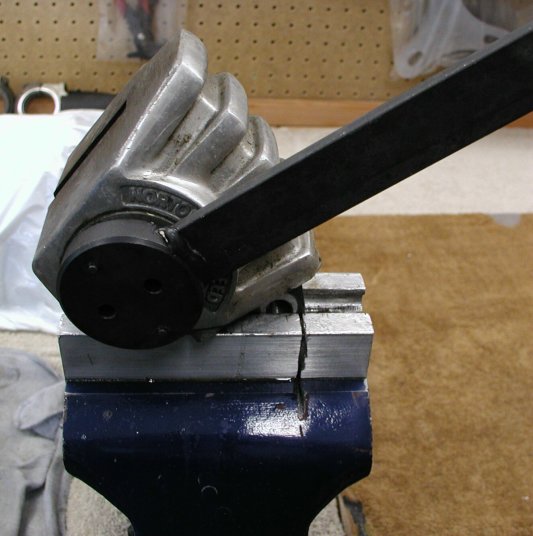
Remove the body plug:
You will need the Andover Norton Peg Spanner
(part # 06-3965,
$48.95)
see Peg Spanner Tool.
The larger round pegs on this spanner are for removal and fitting of the disc brake caliper end plug (right hand thread).
Place the caliper in a vice and gently tap on the spanner with a dead blow hammer.
The caliper seal plug can sometimes be very tightly fitted due to corrosion, etc. so if the gentle tap on the spanner does not loosen
the plug, carefully heat the caliper body around the plug and the plug should break loose.
The pegs of the removal tool are not designed to withstand the load imposed if the end plug is overly tight.

Removing the pistons: After the body plug is removed, tap the outside piston (the piston under the plug) with a drift until it is beyond the rubber seal.
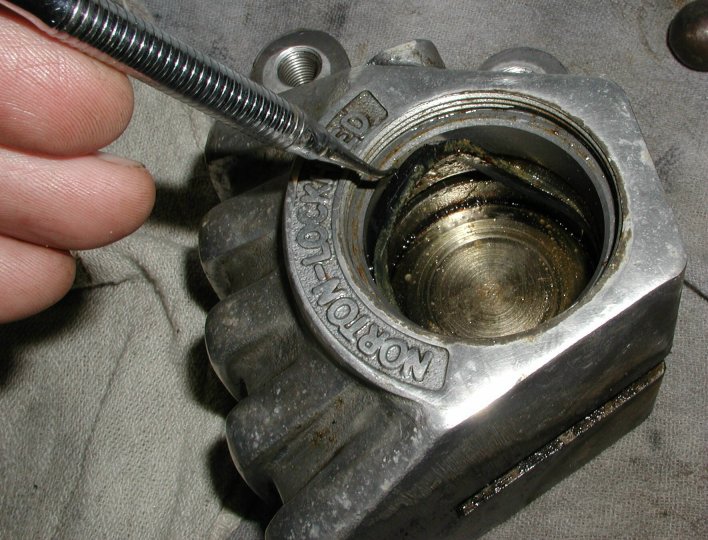
Using some kind of pick, remove the rubber seal, taking care not to scratch the piston bore on the caliper body.
Clean the sides of the piston bore and remove the outside piston. You should be able to center the piston in the bore by gently using a screwdriver on the back of the piston (the part that touches the back of the brake pads), then tap the caliper on the bench, plug hole down and the outside piston should drop out. This is the easy piston to remove.
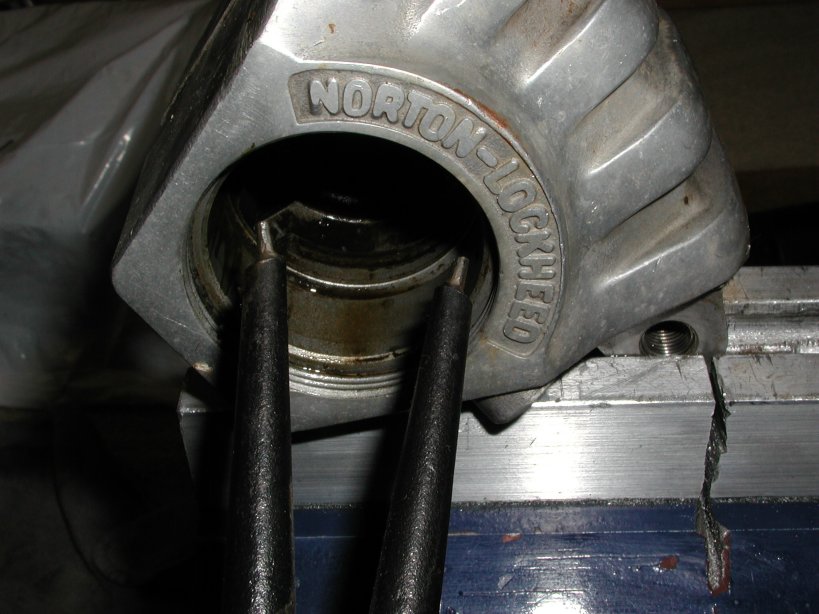
The inside piston can be rather difficult to remove. I first try to twist it out using a large set of circlip pliers pressed against the inside of the piston. This almost always works with stainless pistons and about 25% of the time with steel pistons.

If the piston will not cooperate, I heat the caliper body around the piston and try again. In rare cases this still will not work. I then reheat the caliper body, and using compressed air, blow air through the bleed hole and holding a finger over the hole in the outer piston bore, blow the piston out.
Reassemble the caliper: Make sure all the fluid passages, piston bores and threads (bleed nipple and brake line) are thoroughly clean. I use a small stainless steel round brush to clean the threads since I find that they get junked up and need extra attention. You can also chase the threads on the bleed nipple with a 1/4 x 28 tap and the brake line thread with a 3/8 x 24 tap.
Check the pistons to make sure the edges are smooth and not sharp. I normally polish the edges so they do not hang up on the rubber seal.
Place the rubber seal in the inside piston bore and lubricate the seal with brake fluid. If you are not going to install the caliper and fill it with brake fluid right away, you should use hydraulic brake cylinder assembly fluid to lubricate the seals, not brake fluid. Brake fluid is subject to moisture contamination when exposed to air for a period of time, where the assembly fluid is not.
Insert the piston making sure the flat side of the piston goes in first. Push the piston in just enough so the brake pad will fit.
Place the rubber seal in the outside piston bore and lubricate the seal with brake fluid. Insert the piston making sure the cupped side of the piston goes in first. Push the piston in enough to expose the two fluid passage holes. Make sure you can insert both brake pads. If not, adjust the pistons so both brake pads will fit.
Make sure the body plug is thoroughly clean and insert the rubber seal in the body plug. Screw in the body plug and tighten using the Norton peg spanner. The plug should screw in flush with the caliper body and only needs to be tight since the rubber seal will seal the plug and serve as a locking washer.
Screw in the bleed nipple and you are ready to mount the caliper on your bike.
This page was written and designed by F. H. Eaton & Associates if you have any questions or comments please contact us at info@fheaton.com