


and setting up the backfire assembly
by Fred Eaton
Summary:
This article is meant to add to the information in the MK3 shop manual (part number 00-4224) on assembling the starter gear train. The information in the shop manual is not repeated in this article, but some times it helps to see pictures of the actual part and get a bit of additional information to fully understand a procedure.
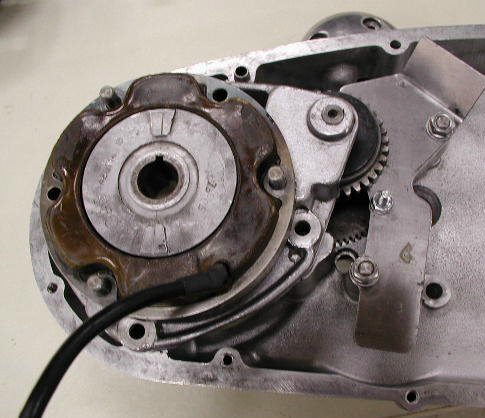
Crank Shaft Parts:
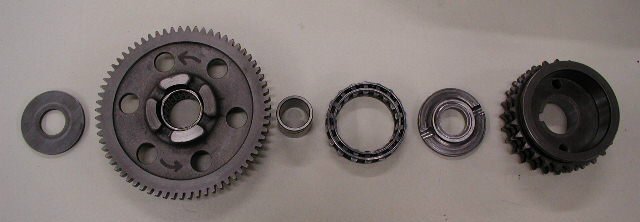
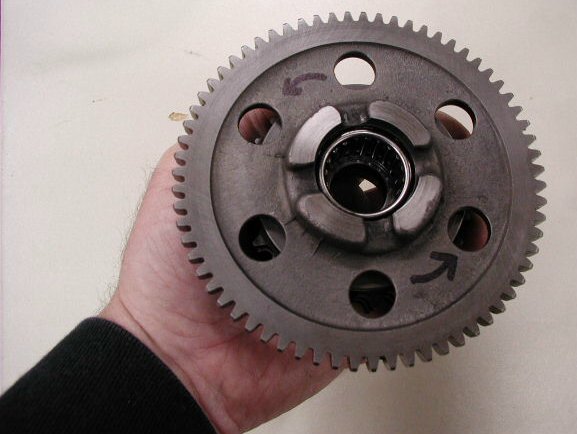
This picture shows the parts that fit on to the crank shaft and they are laid out in the proper order for assembling. Starting from the right you have the drive sprocket (06-4681). The tapered end of the I.D. on the drive sprocket goes on the crank shaft first. We will assemble the parts off the crank shaft to show how they fit together, but you will assemble them on the crank shaft. Pre-assembling the parts this way is a good way to verify that the sprag bearing (06-4733) is inserted into the drive sprocket correctly.
When replacing the sprag bearing, you need to make sure the bearing race in the drive sprocket and the bearing race on the crank gear are not worn and dimensionally correct. The drive sprocket (06-4681) I.D. should be 2.280" to 2.281" and the crank gear (06-4731) O.D. should be 1.6253" to 1.6248". The old sprag bearings came with 14 rollers, where the new ones come with 18 rollers and since the sprag bearing is normally a trouble spot with the starter system, it is recommended you upgrade to the new bearing if you have the old bearing.
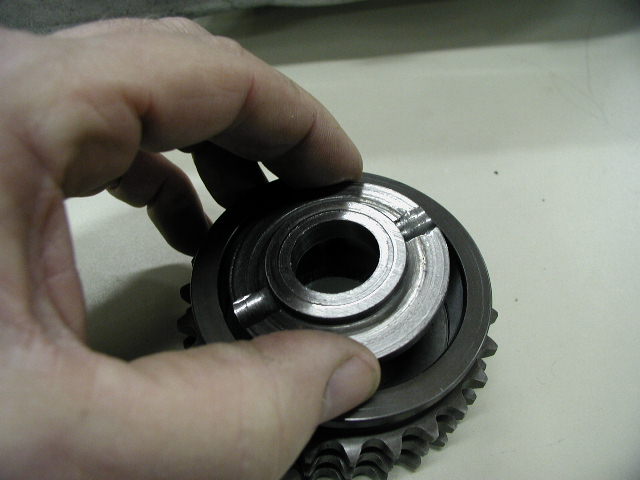
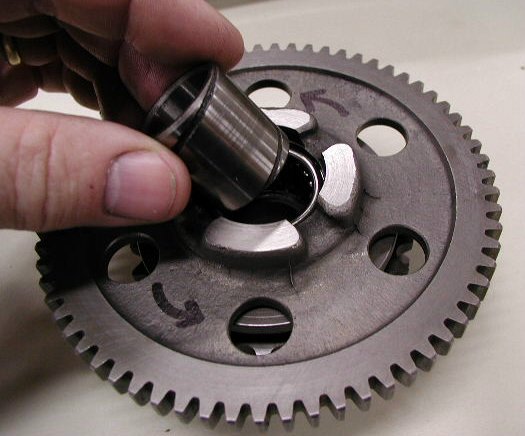
The outer washer (06-5761) is inserted into the drive sprocket with the flat side going in first.
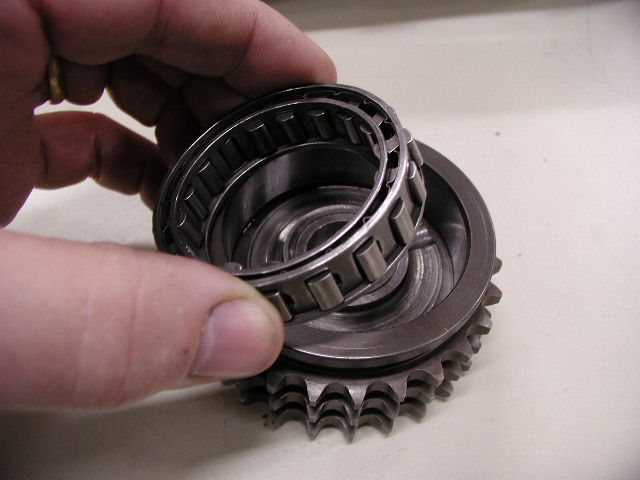
The sprag bearing (06-4733) is inserted into the drive sprocket next with the flange side going in first.
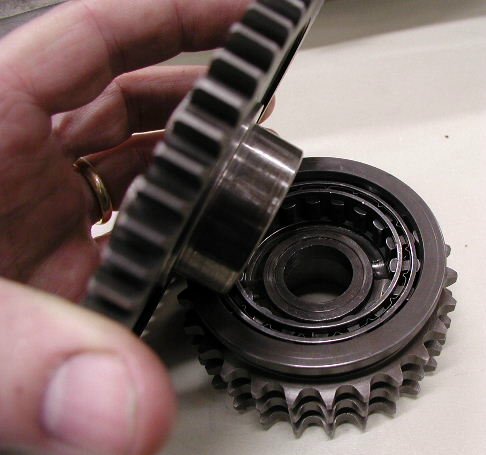
Insert the needle bearing (06-4711) into the crank gear (06-4731). This assembly is fitted into the center of the sprag bearing.
The inner race (06-5820) is inserted between the crank shaft and the needle bearing. You may find it easier to have the inner race on the crank shaft before inserting the crank gear over the crank shaft.
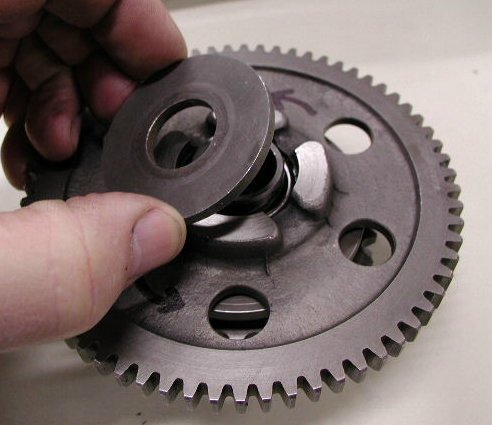
The final part of this assembly before the alternator is fitted is the inner washer (06-5828).
To verify that you have the sprag bearing correctly fitted and verify that the sprag bearing is working correctly, place the above assembly in your hand holding on the drive sprocket. You should not be able to turn the crank gear counter-clockwise, which is the direction that the starter motor turns this gear. You should be able to freely spin the crank gear clockwise. There will be some drag on the crank gear when rotated clockwise, but it should turn freely. If the crank gear does rotate counter-clockwise and does not rotate clockwise, you have the sprag bearing in backwards. If the crank gear rotates in both directions or does not rotate in either direction, your sprag bearing is probably bad.
Rotation of gear train:
The starter gear will rotate clockwise when the starter button is pressed.
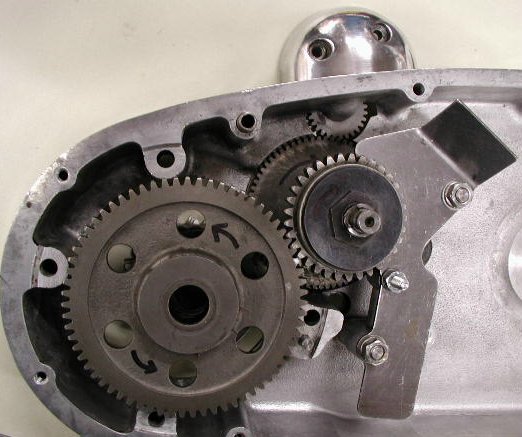
The idler gear (06-4702) will rotate counter-clockwise). The overload backfire gear assembly will rotate clockwise. As stated above the crank gear rotates counter-clockwise in the direction of the crank shaft rotation.
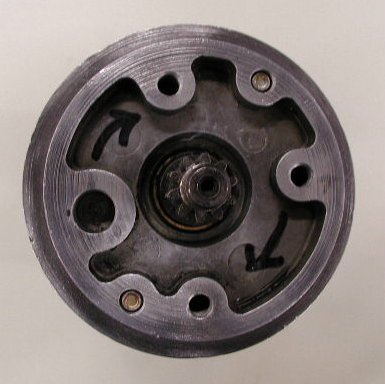
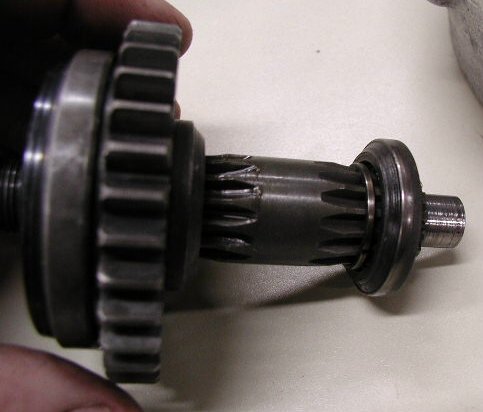
Small idler gear:
This picture shows the proper assembly of the small idler gear and the idler spindle (06-4703). The threaded end of the spindle points towards the starter motor.
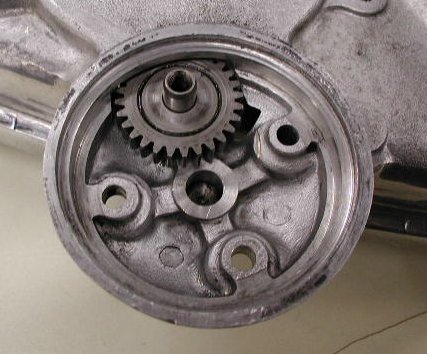
Overload backfire device assembly:
For assembly and adjustment instruction of the backfire device see our article Overload backfire device assembly and adjustment .
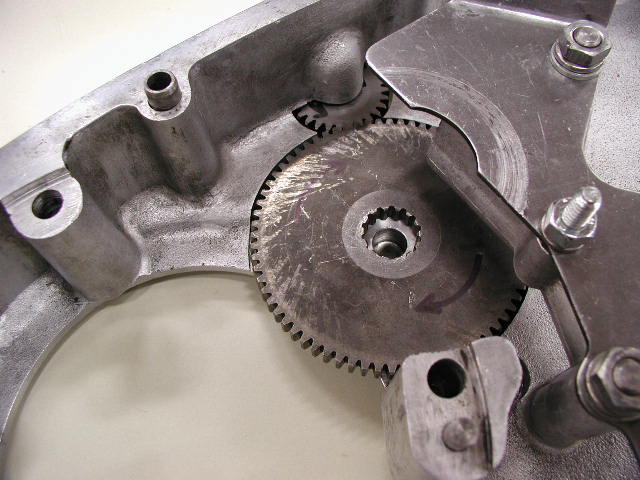
You will have to install the triplex chain and the tensioner assembly prior to fitting the overload backfire device assembly into the large idler gear (06-4705). This picture and the next just show proper placement since the tensioner assembly is not fully assembled and the triplex chain is not installed.
This page was written and designed by F. H. Eaton & Associates if you have any questions or comments please contact us at info@fheaton.com