


and swingarm on the engine cradle
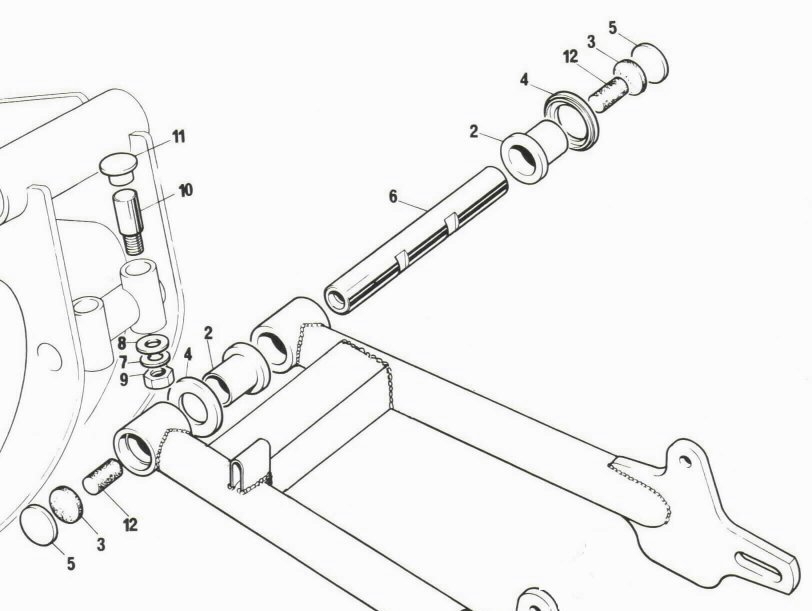
The MK3 lubrication is a one time lubrication system that in theory permanently lubricates the bushings. Each bushing has two felt wicks (3 & 12) that are soaked in oil and sealed by a welch plug (5) on one end and an oil seal (4) on the other end.
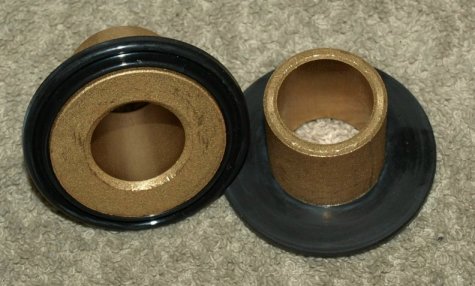
Slide the oil seals (4) over the bushings (2) with the flat side of the oil seal facing the swingarm and the seal side facing the engine cradle. Then press the bushing into the swingarm end. We use a long bar with an O.D. just under 7/8" so it will fit through the bushing and a drift that fits into the face of the bushing. We then press each bushing into the swingarm making sure that each bushing is firmly bottomed out. A press is the correct way to install the bushings, but if you are very careful, you can use a bench vise to press the bushings or use a hammer along with a drift against the bushings.
Slide the swingarm on to the engine cradle. Make sure you have the swingarm facing in the correct direction.
Slightly oil the swingarm spindle (6) with the same oil that you are going to use to soak the oil wicks (see soaking the wicks below).
Align the spindle with the flats inline with the cotter pin tubes on the engine cradle.
Slide the spindle through one bushing, through the engine cradle and into the other bushing making sure the flats on the
spindle allign with the openings of the cotter pin tubes. The threads in the spindle are 9/16 x 18, which are the same threads
on the front axle. If the flats do not align correctly, thread something into one end of the spindle and rotate the spindle
until the flats are correctly aligned.
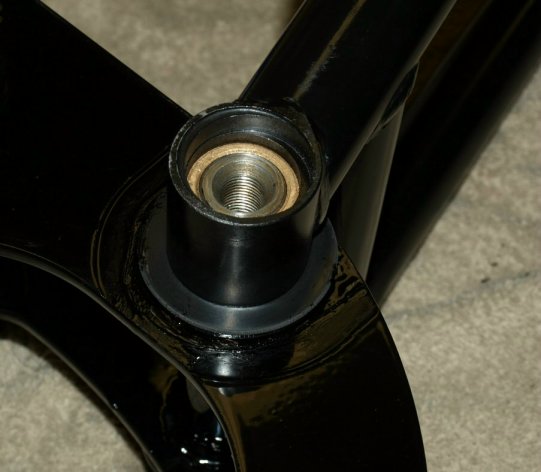
Install the cotter pins (10) into the engine cradle from the top. You need to tap the top of the cotter pins with a drift to firmly seat
the cotter pin. Place the fiber washer (8), then the flat washer (7), then the nut (9) on the end of the cotter pin.
Tighten the nut to firmly seal the fiber washer against the cotter tube. Around 10 ft.lb. to 15 ft.lb. will seal the
fiber washer. We use a 1/4 X 28 lock nut, instead of the plain nut used by the factory, so all we have to do is tighten the nut enough to make
a good seal and not worry about the nut vibrating loose.
Insert the rubber plugs (11) on top of the cotter tubes.
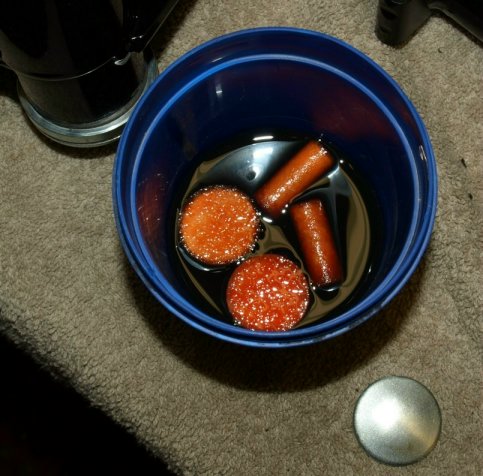
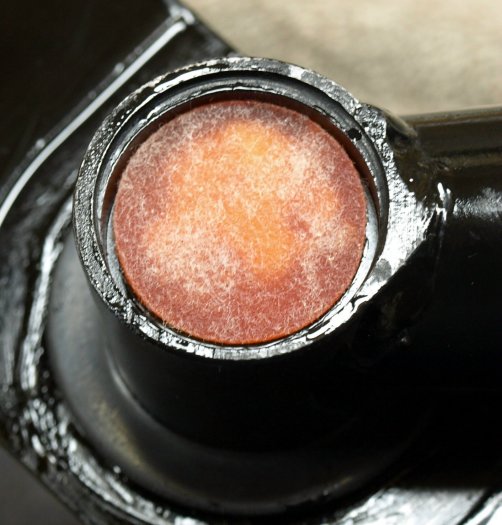
Soak the felt wicks in 90 weight or greater oil. The wicks will expand slightly when they absorb the oil. Let the wicks drain off the excess oil for a couple of minutes prior to installing. The oil wick (12) will not slide into the swingarm spindle due to its expanded size. Turn the wick clockwise and thread it into the spindle. You will need to use a needle nose pliers to completely thread the wick into the spindle. The top of the wick should be flush with the end of the spindle.
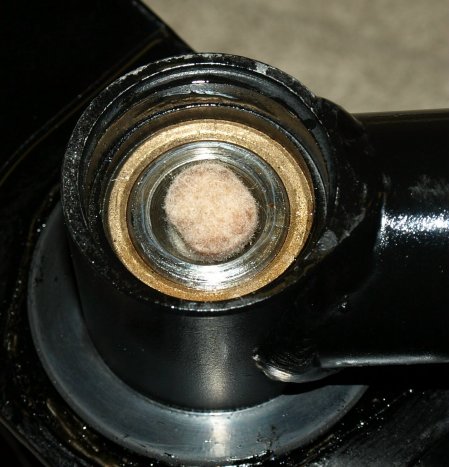
Place the oil disc wick (3) on top of the spindle.
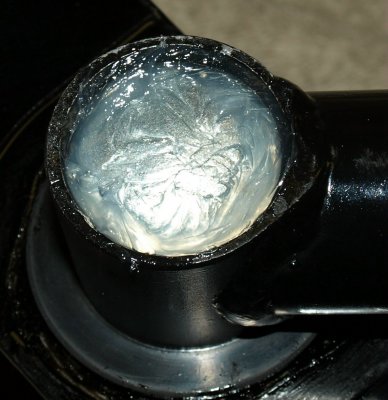
Place the welch plug (5), concave side down, into the end of the swingarm.
The factory would punch the center of the welch plug to flatten it out, expanding the O.D. and sealing the system. When the welch plug is installed this way and if it ever needed to be removed for maintence or whatever, you would have to drill and tap the welch plug in order to pull it from the swingarm. We have found that placing a clean dry welch plug into a clean dry swingarm end and putting a bead of silicone adhesive sealant around and over the plug, will seal the end of the swingarm and hold the welch plug in place. This allows for easy removal of the welch plug by removing the silicone and using a strong magnet. Since the swingarm ends are not visable, using clear silicone does not distract from the appearance of the bike.
This page was written and designed by F. H. Eaton
& Associates if you have any questions or comments please
contact us at info@fheaton.com